The “WordPress Keeps Logging Out” error is a frustrating issue for WordPress users that can be caused by various factors. This can include corrupted cookies, plugin conflicts, insufficient PHP memory, incorrect URL settings, or server-related issues.
There are several steps you can take to troubleshoot and fix the problem.
By identifying the underlying cause and following the appropriate steps, such as clearing your browser cache, disabling plugins, or increasing PHP memory, you can ensure that you stay logged in and can work efficiently on your WordPress site.
Common Causes
WordPress Keeps Logging Out Error can occur due to the following causes:
I. Corrupted Cookies
Corrupted cookies are one of the most common causes of the problem. To fix this, you can clear your browser cookies and cache or try accessing the site from a different browser or device.
II. Plugin Conflicts
If there’s a plugin conflict, try deactivating all of your plugins and see if the problem goes away. If it does, reactivate each plugin one by one to identify the one causing the issue.
III. Insufficient PHP Memory
Increasing your PHP memory limit can help fix the issue if it’s caused by insufficient memory.
IV. Incorrect URL Settings
If your WordPress site’s URL settings are incorrect, it can cause a problem. Make sure that your WordPress Address (URL) and Site Address (URL) fields are set correctly.
V. Server-Related Issues
Server-related issues such as caching problems or database connection issues can cause the problem. Contact your web host or a WordPress developer for help resolving server-related issues.
7 Ways to Fix WordPress Keeps Logging Out
- Clear Browser Cookies and Cache
- Disable Plugins
- Increase PHP Memory Limit
- Check URL Settings
- Check Server-related Issues
- Update WordPress
Method 1: Clear Browser Cookies and Cache
Cookies are small files that store data related to your login information, website preferences, and other website-specific data. Corrupted cookies can often cause the problem.
Clearing your browser’s cookies and cache will delete any corrupted cookies that may be causing the issue, allowing you to log in again. Here’s how to do it for some popular browsers:
A. Google Chrome:
- Click the three dots in the top-right corner of the browser window.
- Select “Settings”.
- Scroll down and click “Advanced”.
- Under “Privacy and security,” click “Clear browsing data”.
- Select “Cookies and other site data” and “Cached images and files”.
- Click “Clear data”.

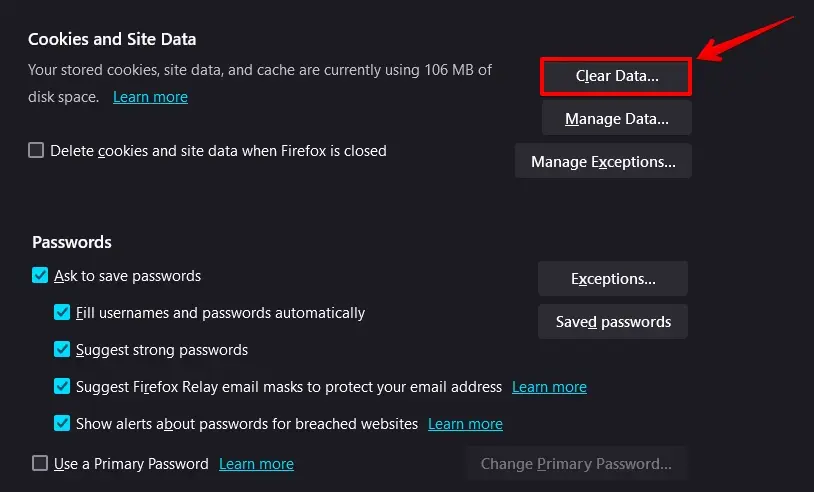
B. Mozilla Firefox:
- Click the three lines in the top-right corner of the browser window.
- Select “Options”.
- In the left sidebar, select “Privacy & Security”.
- Scroll down to the “Cookies and Site Data” section.
- Click “Clear Data”.
- Check “Cookies and Site Data” and “Cached Web Content”.
- Click “Clear”
Method 2: Disable Plugins
The second method to troubleshoot and fix WordPress keeps logging out problem is to disable plugins. Plugin conflicts can often cause this problem.
Plugins are third-party software that you can add to your WordPress site to add functionality, such as contact forms or social media sharing buttons.
To do this, users should follow these steps:
- Go to the Plugins menu in your WordPress dashboard.
- Select all of the plugins by clicking the checkbox at the top of the list.
- In the Bulk Actions dropdown menu, select “Deactivate” and click the “Apply” button.
- This will deactivate all of your plugins at once.
You can use FTP (File Transfer Protocol) as an alternative. Follow these steps to deactivate your plugins using FTP:
- Connect to your website’s server using an FTP client, such as FileZilla.
- Navigate to the “wp-content” folder and the “plugins” folder.
- Find the folder for the plugin that you want to deactivate.
- Rename the plugin folder by adding “-deactivated” to the end of the folder name (e.g., “my-plugin-deactivated“).
By following these steps, users can easily identify and fix the plugin conflict causing the “WordPress Keeps Logging Out” error.
Method 3: Increase PHP Memory Limit
PHP is the programming language used by WordPress, and it requires a certain amount of memory to function correctly. If your WordPress site doesn’t have enough memory, it can cause the “WordPress Keeps Logging Out” error.
Here are the steps to increase the memory limit:
First, log into your cPanel dashboard, then click File Manager.
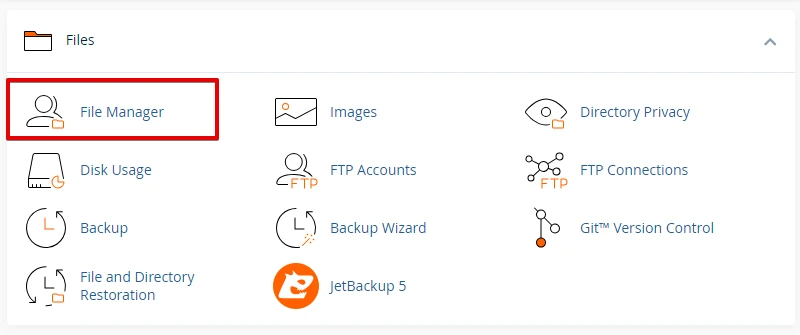
After that, Locate the Locate the wp-config.php file.
Open the wp-config.php file and Add the following line of code to the file anywhere before the line that says /* That's all, stop editing! Happy blogging. */:
define('WP_MEMORY_LIMIT', '256M');
You can replace 256M with a higher value if necessary, depending on your server resources.
By increasing your PHP memory limit, you can ensure that your WordPress site has enough memory to function correctly.
Method 4: Check URL Settings
The fourth method to fix WordPress Keeps Logging Out is to check your website’s URL settings. WordPress has two settings related to your website’s URL: the WordPress Address (URL) and the Site Address (URL).
Here are the step-by-step instructions to fix the incorrect site URLs in WordPress General Settings:
- Login to the WordPress Dashboard using your admin credentials.
- Click on the “Settings” option from the left-hand menu.
- Click on the “General” option to open the General Settings page.
- Verify the “WordPress Address (URL)” and “Site Address (URL)” settings. Your website’s URL should be in these two fields.
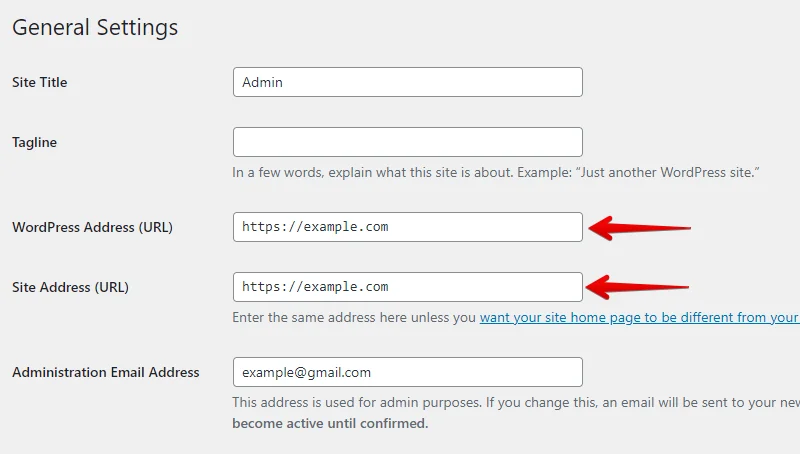
- If the URLs are incorrect, update them with the correct URL of your website.
- Once you have updated the URLs, scroll down to the bottom of the page and click the “Save Changes” button.
- Log out of the WordPress Dashboard.
- Open a new browser window and type in the correct URL of your website.
- Try to log in again with your admin credentials.
- If the log-in issue persists, move on to the next step to troubleshoot the issue.
Method 5: Check Server-Related Issues
Server issues can include problems with your hosting provider, server configuration, or server resources, such as insufficient memory or CPU.
Here are some steps you can take to check for server-related issues:
- Contact your hosting provider to check if any server issues may be causing the problem.
- Check the server error logs to identify any errors or warnings that may be related to the problem.
- Ensure that your server meets the minimum requirements for running WordPress, including the PHP version, MySQL version, and server software.
- Disable any caching plugins or services and see if the issue persists.
- If possible, try accessing your site from a different device or network to see if the problem is isolated to a specific device or network.
This can involve working with your hosting provider or server administrator to resolve the issue.
Method 6: Update WordPress
Please update your WordPress website to the latest version. WordPress updates often contain bug fixes and security patches that can help address issues.
Here are the steps to update WordPress to the latest version:
- Log in to your WordPress dashboard.
- Click on the “Dashboard” tab in the menu on the left-hand side of the screen.
- Click on “Updates” in the sub-menu that appears.
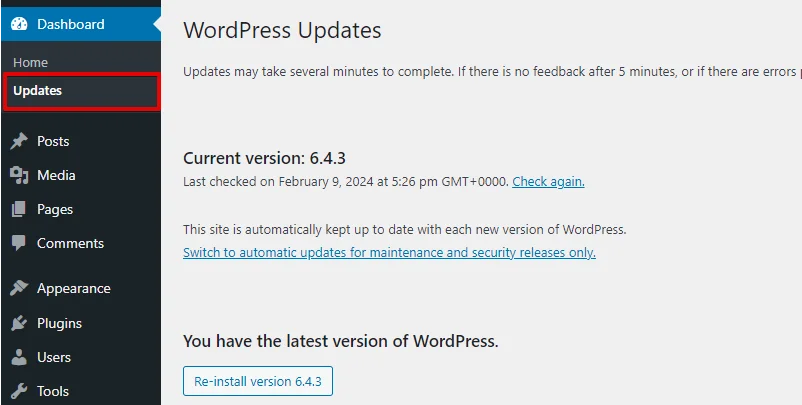
- If there is a new version of WordPress available, you will see a message that says, “An updated version of WordPress is available.” Click on the “Update Now” button.
- WordPress will begin the update process. Depending on the size of the update, this may take a few minutes.
- Once the update is complete, you will see a message that says, “WordPress has been updated successfully.”
Conclusion
By taking the time to troubleshoot and implement these solutions, you can ensure that your WordPress website runs smoothly and your users have uninterrupted access to your content.